Colors
To get the best quality product, ensure you're submitting the best quality files.
Our machines work with the CMYK color mode, files submitted in another color mode will be switched over to CMYK and may result in color changes. We recommend taking a look at our sample pack to see how some colors may turn out
Resolution
All files for printing should be saved at the highest possible resolution, standard is 300 DPI. PDF files should be saved as high quality print. Files with a lower resolution may come out looking pixelated or blurry.
Ensure all graphics are the exact size you want them printed out. If you purchase a 12"x12" transfer and your graphic is only 10", it will be printed as 10"
Transparency
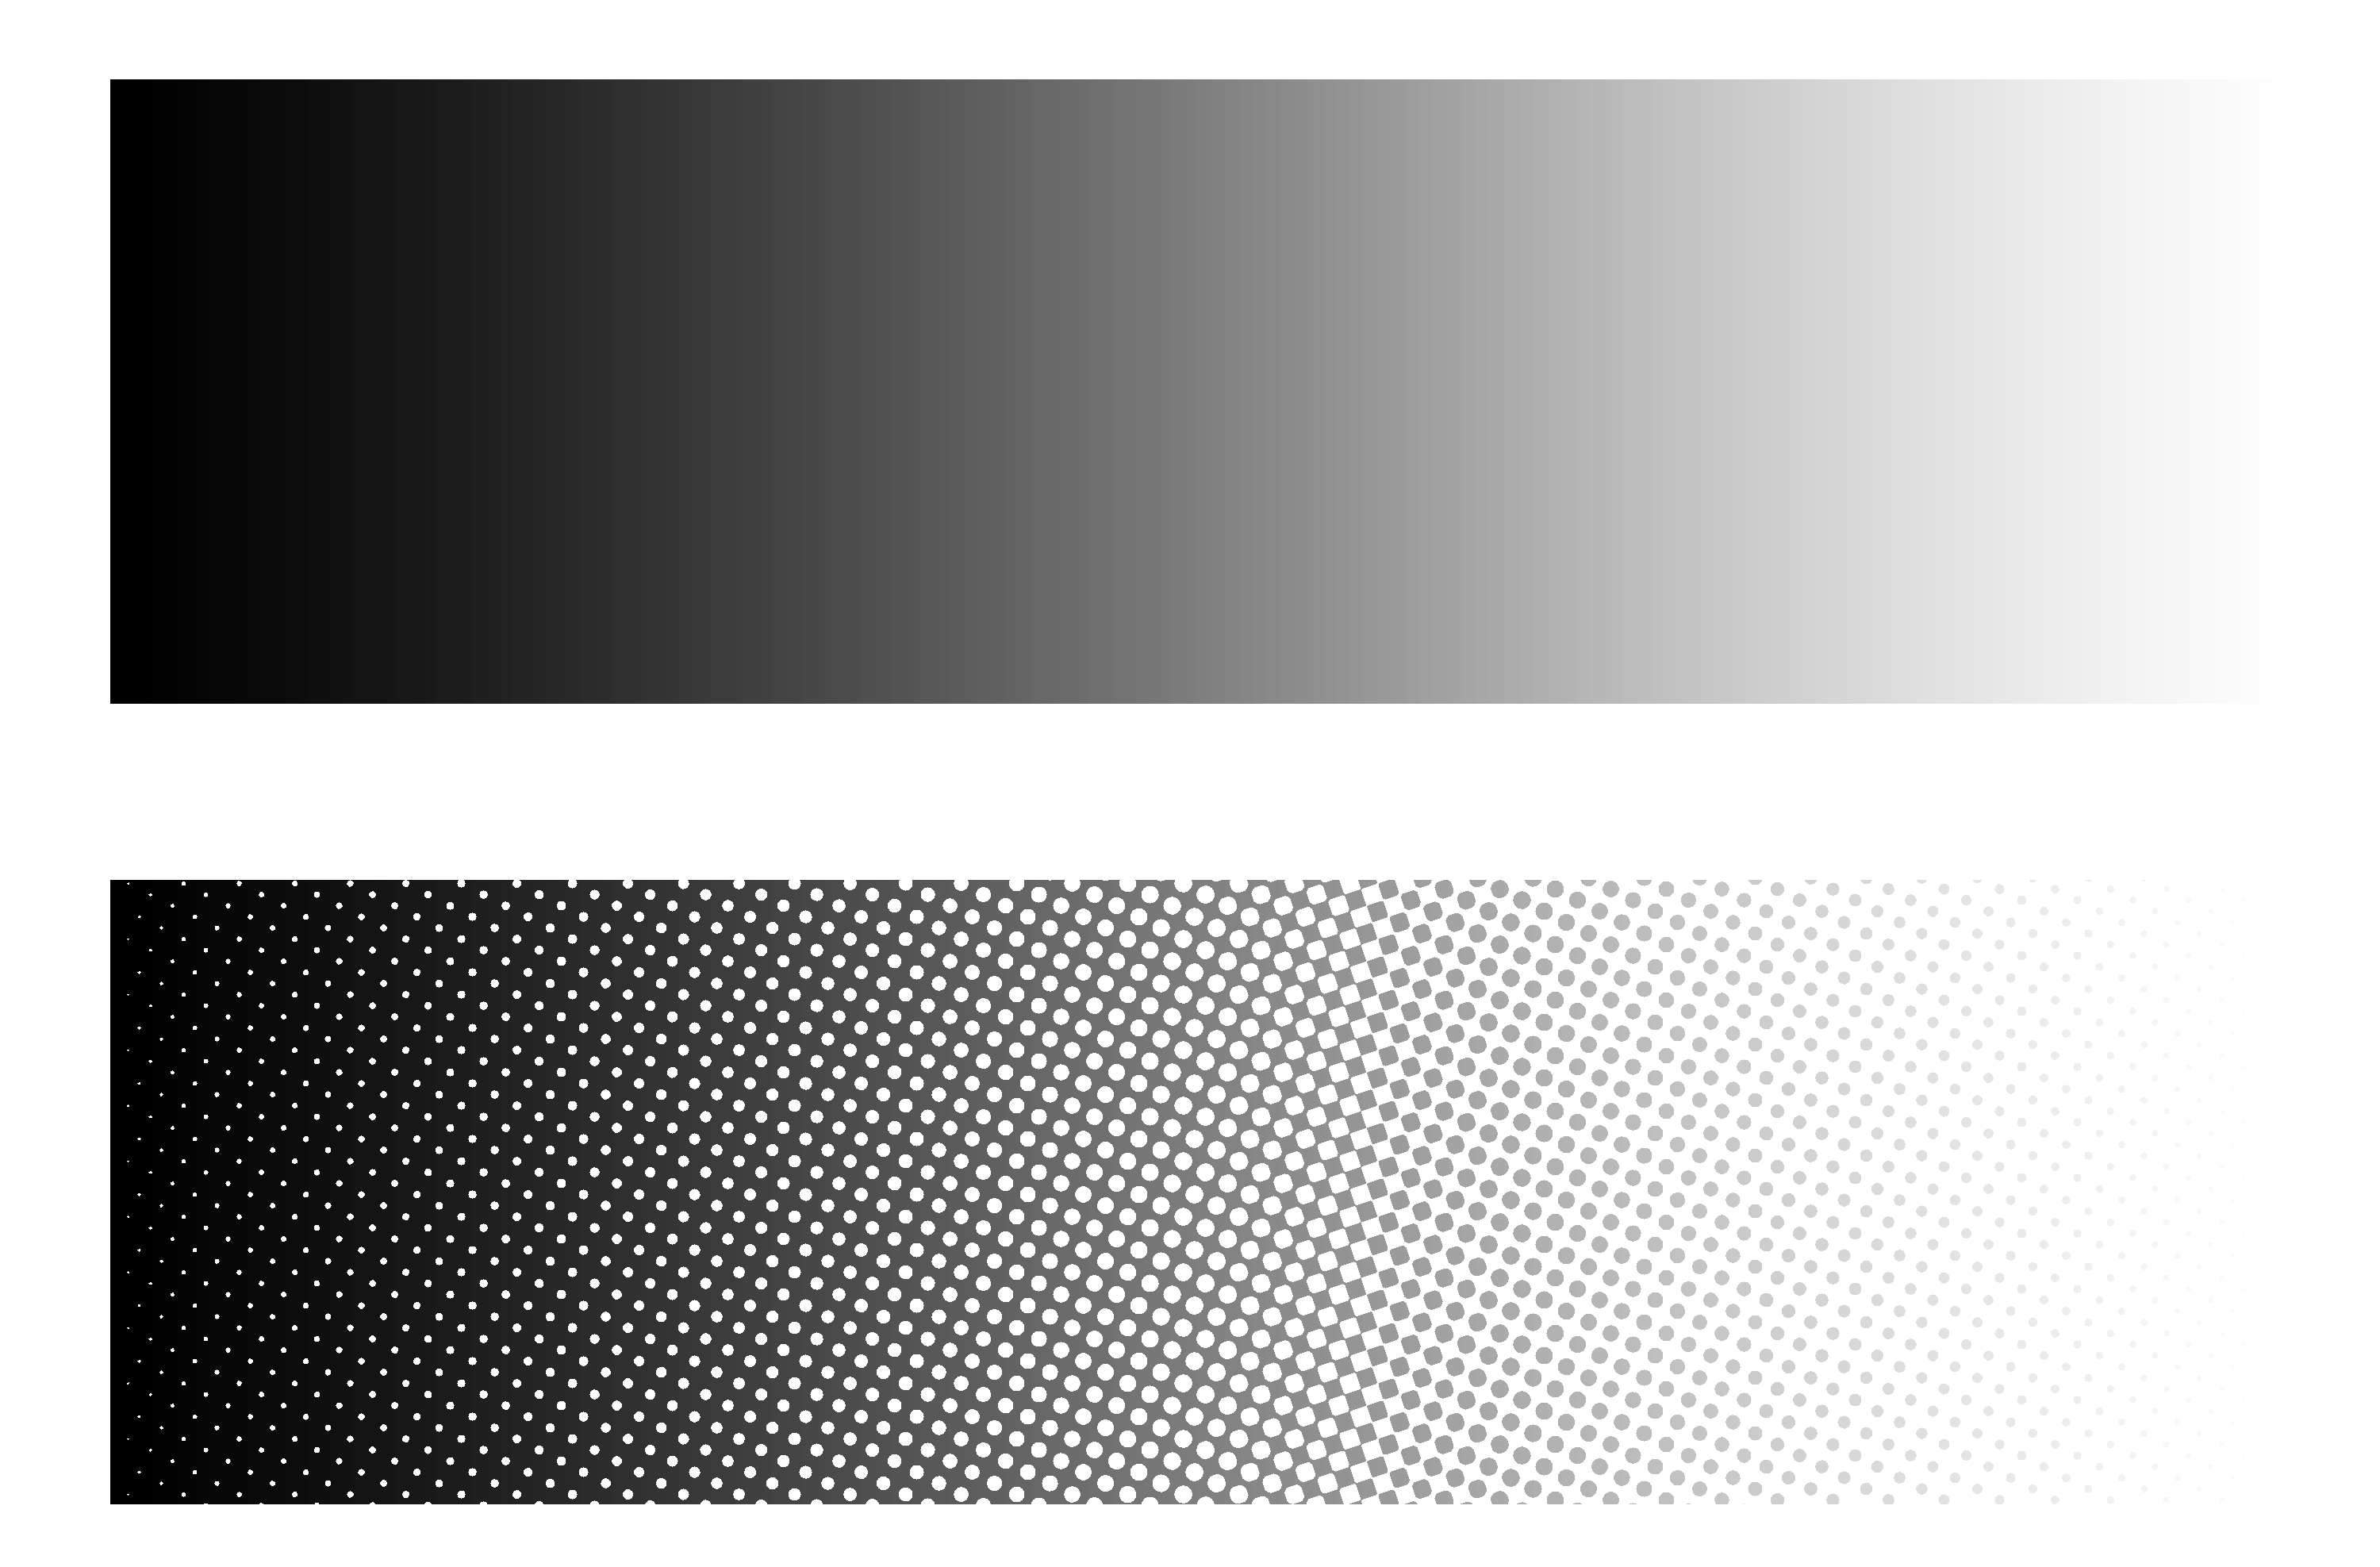
Be careful when submitting files with transparent pixels, as they will be picked up by our software and have a white under base added. For fades and gradients, we recommend turning them into halftones.
Bleed
Due to how DTF printing works, transfers may have a thin white outline around all graphics. To avoid this we remove a few pixels from the edge to ensure there's no white outline on the transfer. This means that any graphics with thin lines may not be able to be trimmed properly to avoid the white outline. For best results add a stroke around your graphic or make sure there are no super thin sections on your design.
Reach out to our designers if you need help with any graphic work
-
Halftones
For the best look with transparency we recommend getting them turned into halftones.
This way you can get a nice looking gradient without any under base problems.

Here are some of the settings we use with our machines.
All machines are different, so you may have to make some adjustments if your transfers aren't adhereing properly.
-
100% Cotton
- 300°F-320°F
- 15 Seconds
- Medium Pressure
-
50/50 Blend
- 265°F-275°F
- 20 Seconds
- Low Pressure
-
100% Polyester
- 250°F-265°F
- 30 Seconds
- Low Pressure
-
Nylon
- 240°F-250°F
- 15 Seconds
- Low Pressure
-
Neoprene
- 240°F-250°F
- 20 Seconds
- Low Pressure
-
Wood
- 275°F-300°F
- 15 Seconds
- Low Pressure
After pressing the transfer onto your item, take it off the press and allow it to cool. Peeling the film before it has had time to cool down may rip it off your item before it adheres properly.
You can place it on a cooling station or simply move something cool, like a metal weight, across it to cool it down faster. Once the film has cooled down to room temperature, peel it off the item.
Before running off with your freshly customized item, give it one last quick 5 second press to bring the colors to life. This final press makes the colors more vibrant and gives it extra adhesion.